Sync files between Colab and GitLab
Had you faced a situation where a program requires you to preload a set of auxiliary files at the beginning of its runtime on platforms such as Colab? Did you manually upload those missing pieces one by one by interacting with the notebook every time you launch a new Colab instance? Is there a way to streamline the workflow by simply cloning the requirement.txt file somewhere on the Internet down to your Colab instance? Reversely, have you wanted to git push your work on Colab to the remote repository for version control and portability between instances?
In this post, you will learn how to download files from a Git repository such as GitLab to your Colab instance using personal access tokens, an alternative to using passwords for authentication to Git repositories when using the Git API on Colab. The same procedure is applicable to other cloud computing platforms and cases when using the command line.
In the text below, you will also learn the routine to push your work from Colab to your Git repository. By doing so, you save the trouble to manually conduct version control by downloading your work to local machines and then uploading your work to a remote Git repo. Let’s get started.
Prerequisites
- A GitLab account (you may GitHub as well, but in this example we use GitLab)
- The knowledge of Git Push local repository content to a remote repository on GitLab
Outline of the procedure
- (Optional) Create a new GitLab project
- Generate a GitLab personal access token
- Clone or pull the GitLab repository to Colab
- Git Push your work from Colab to GitLab
(Optional) Create a new GitLab project
Navigate to
gitlab.comand then login with your credentialsProject configuration.
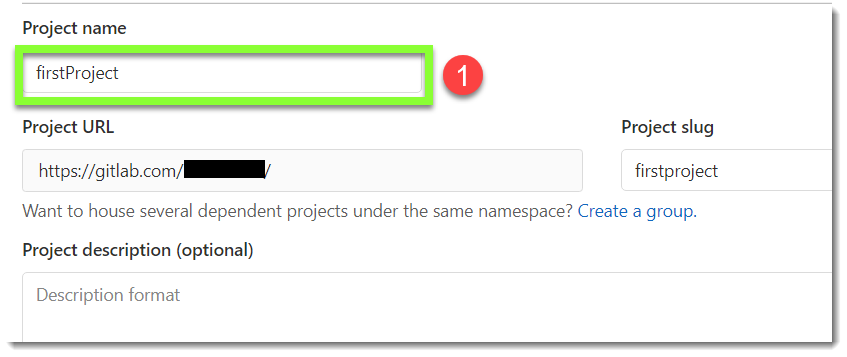
Click Projects and click create blank project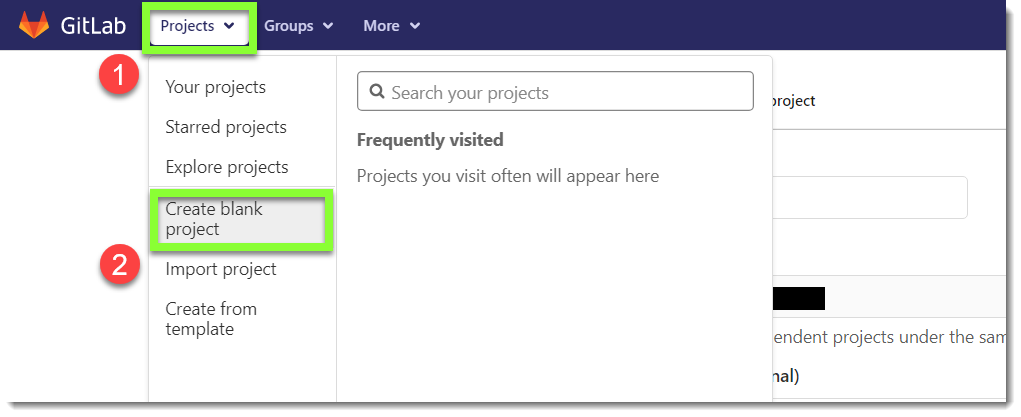 Fill out the **Project name** box with a name you prefer. Suppose we name it `firstProject`.
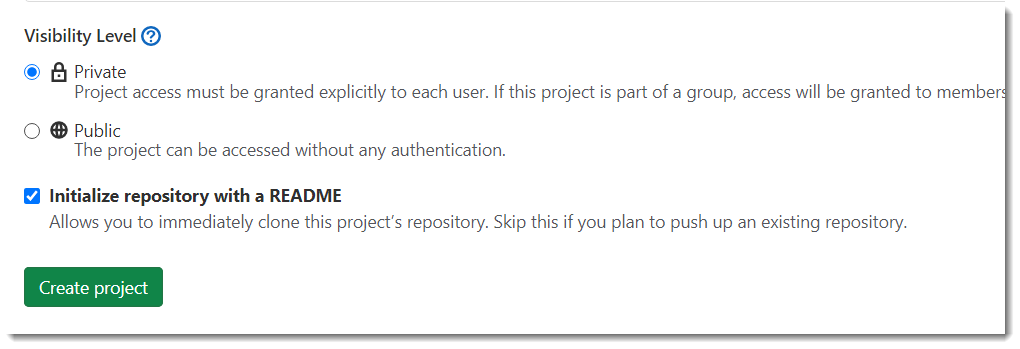
 Set **visibility level** to your preference.
For illustrative convenience, I check the box next to **Initialize repository with a README**.
Finally, leave the page after clicking on **Create project**.
 Your new GitLab project should be online now. The URL pattern of a GitLab project runs like this:
gitlab.com/<username>/<project-title>For example, suppose your GitLab username is
johndoe. Then the URL of your newly-created project homepage on GitLab in our case should behttps://gitlab.com/johndoe/firstproject. It looks like this: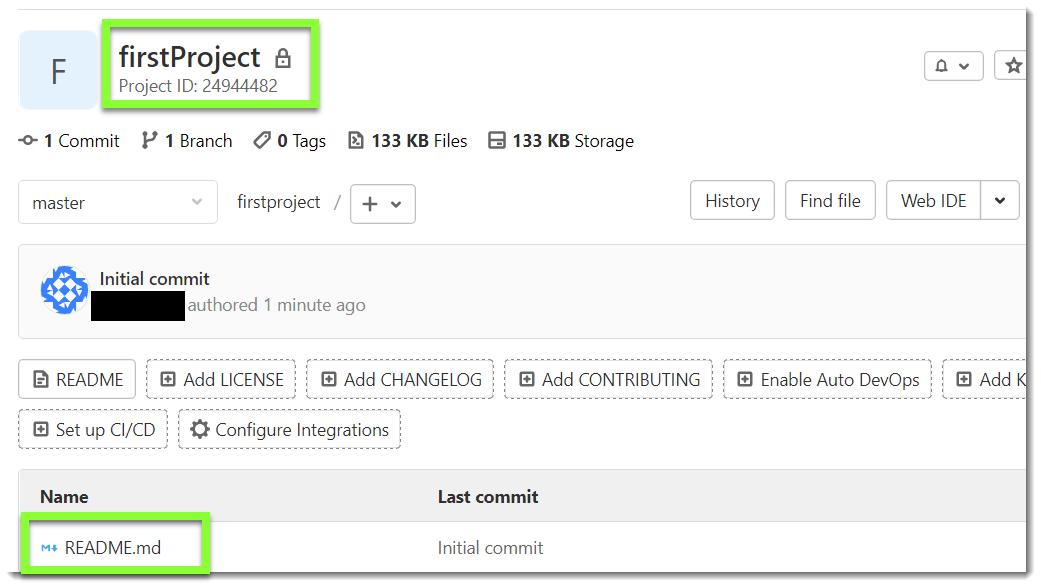
Now, check to see the URL of the project’s repository by clicking on the blue Clone button.
Then copy the text under Clone with HTTPS by clicking on the copy icon to the right.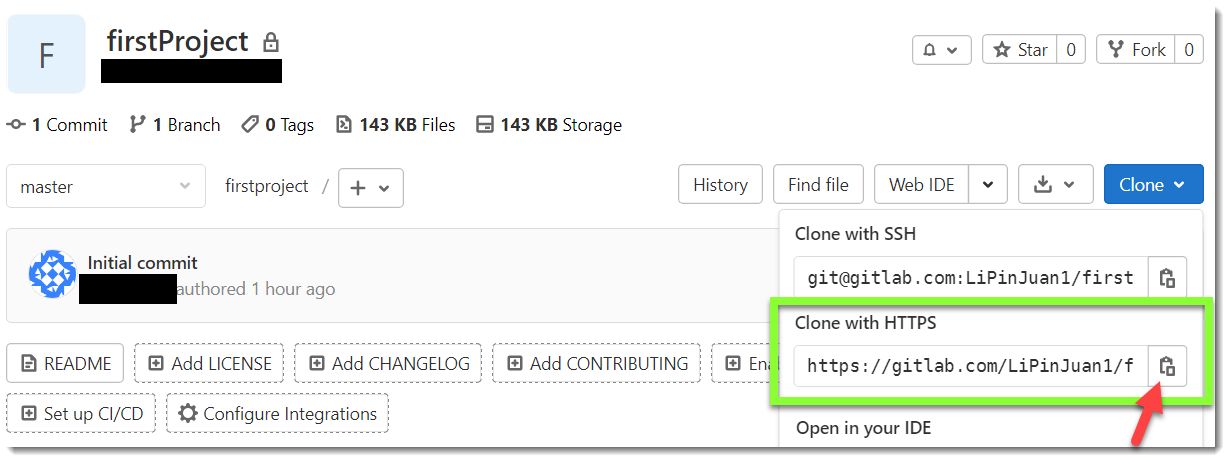
In our example, the URL should look similar to this:
https://gitlab.com/johndoe/firstproject.gitNow we are moving to the next phase.
Generate a GitLab personal access token
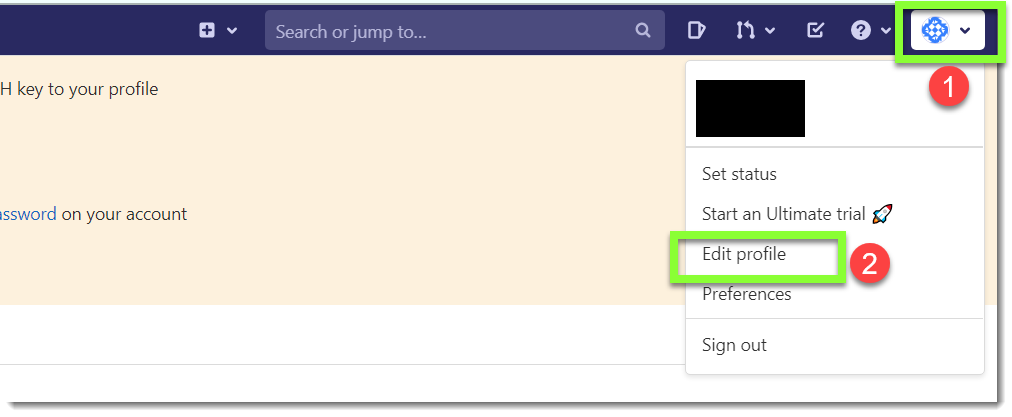
Go to the top right corner of your GitLab console. Then click on your avatar. In the drop-down menu, click on Edit profile.
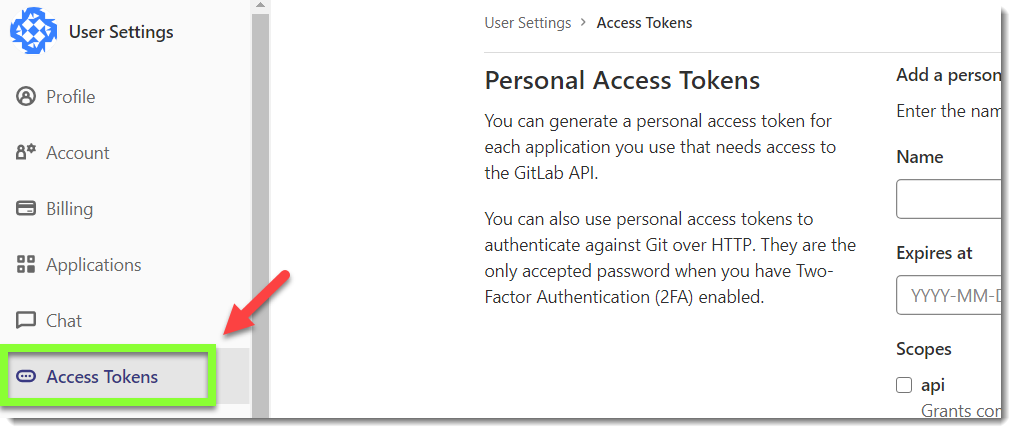
In the left sidebar, choose Access Tokens
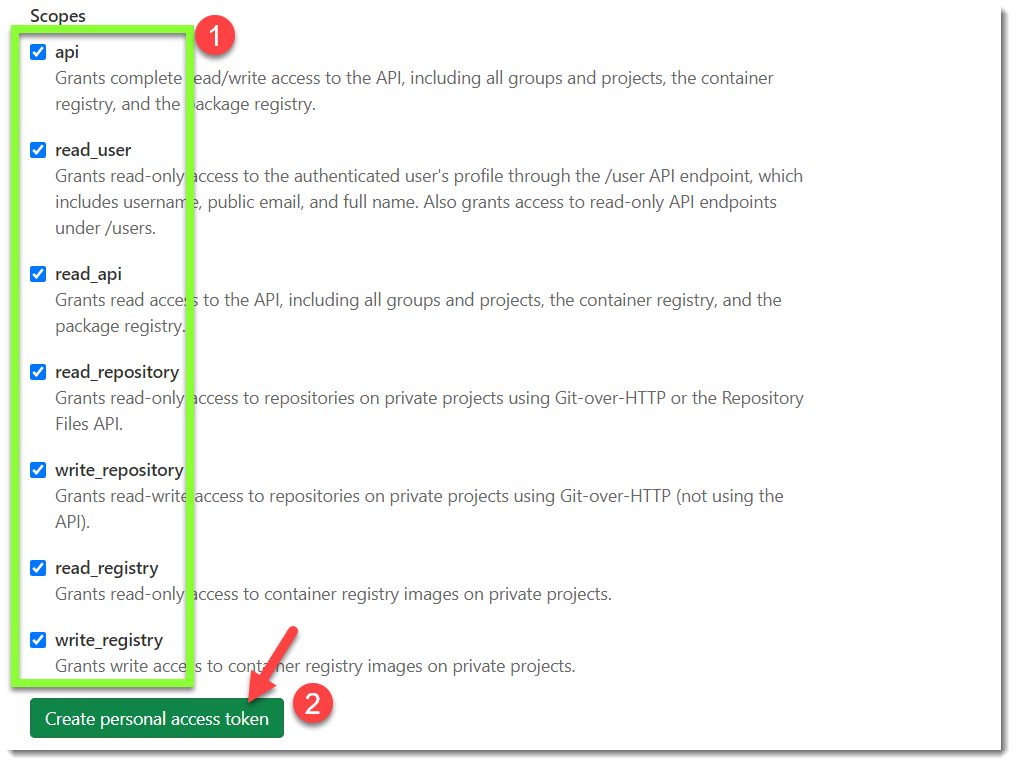
Under the Add a personal access token section, fill out a name for your new token and leave the Expires at box blank if you do not know what it means. : ) Without diving into details in this short quick start guide, just check all the boxes under the Scopes subsection and lastly click on the Create personal access token button.
The browser would reload the page automatically. You should see your new personal access displayed on the screen like this:
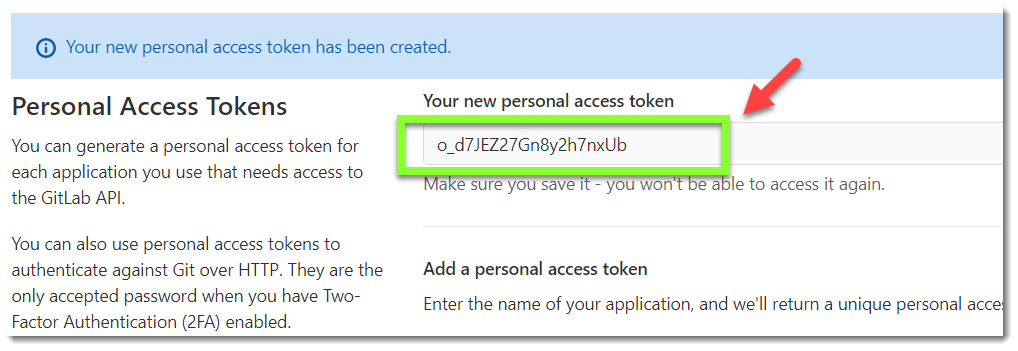 IMPORTANT! Copy and save the personal access token to a safe place. Make sure you save it because you won't be able to access it again.
In the same webpage, scroll down the full information about the new token. If the token is named as
firstToken, then the message should be something like this:
Clone or pull the remote GitLab repository to Colab
Scenario 1. Clone the remote GitLab repository to an empty Colab folder
- In a new Colab notebook cell, run the following commands after substituting place holders
abcandabc@mail.comwith your preferred name and email:
According to the pattern below!git config - global user.name "abc" !git config - global user.email "abc@mail.com"
In our example, the URL to use turns out to be like this:https://<token name you picked>:<the personal access token>@<gitlab host>/<user or group>/<repository or project name>.githttps://firstToken:o_d7JEZ123456789nxUb@gitlab.com/johndoe/firstproject.git - To clone the remote repository to our Colab instance, run:
And you can check to see the status of the local repository after git clone by running:!git clone https://firstToken:o_d7JEZ123456789nxUb@gitlab.com/johndoe/firstproject.git
It should return something like this:%cd firstproject/ !git status/content/firstproject On branch master Your branch is up to date with 'origin/master'.
Scenario 2. Initiate a local repository with files/folders to be Git ignored
Suppose we want to use the default Colab working directory /content as the local repository.
- Set up your username and email as in Case one.
Substitute your username and email for placeholders!git config - global user.name "abc" !git config - global user.email "abc@mail.com"abcandabc@mail.com. - It would be better for us to set up
.gitignorefile before runninggit init. Or we need to handle the subsequent issue:
In our example, the default Colab working directory contains two folders!echo ".config/" >> .gitignore !echo "sample_data/" >> .gitignore !echo ".gitignore" >> .gitignoresample_data/and.config/. Besides, we like to ignore.gitignoreitself too. - Now, we initiate Git in the
/contentfolder:%cd /content !git init !git status - Set up the location of the remote repository, in our example by running:
!git remote add origin https://firstToken:o_d7JEZ123456789nxUb@gitlab.com/johndoe/firstproject.git - Since we are merging two originally unrelated projects, a remote one and a local one, we need to issue the following command to finalize our initialization:
!!git pull origin master - allow-unrelated-histories
Git Push your work from Colab to GitLab
It’s the last step in our procedure. Compared with the preceding sections, the commands of this section are straightforward.
Suppose we have written a text file, test.txt, that contains a short message “hello world” to be synchronized with the remote repository. Here is the recipe.
- First, let’s generate the text file by running:
!echo "hello world" >> test.txt - Second, following the routine to stage, commit, and push the file up to the GitLab repository.
Done!!git add test.txt !git commit -m 'test' !git push -u origin master
Conclusion
With a toy GitLab project and a toy file, we went through the routine to push our work from a Colab instance to a designated GitLab repository. I hope you had fun and find it useful as I did when learning the configuration of a GitLab personal access token and the initialization of the version control on a Colab instance. The same workflow can be applied to other cloud computing platforms such as AWS or AZURE to sync your local changes to a remote Git repository and vice versa by using a personal access token. Wish you have a more productive coding workflow!